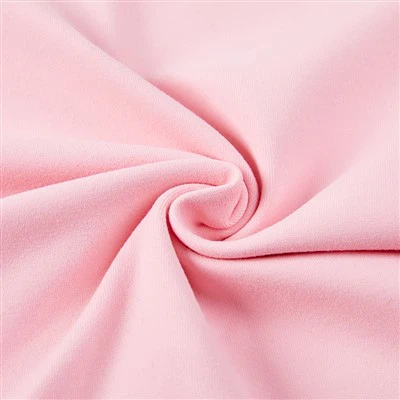
Hey there, fellow yoga enthusiasts and fabric lovers! I'm a supplier of Yoga Knit Fabric, and today, I'm stoked to chat about the best way to hem this amazing material. Yoga knit fabric is super popular for making yoga pants, tops, and other activewear because it's stretchy, comfortable, and breathable. But hemming it can be a bit tricky if you don't know the right techniques. So, let's dive in!
First off, let's talk about why hemming yoga knit fabric properly is so important. When you're doing yoga, you want your clothes to move with you, not restrict your movements. A poorly hemmed piece of fabric can create bulk, which can be uncomfortable and even affect your range of motion. Plus, a neat hem makes your finished product look more professional and polished.
There are a few different methods you can use to hem yoga knit fabric, and each has its own pros and cons. Let's take a look at some of the most common ones.
1. Straight Stitch Hemming
This is the simplest method, and it's a good option if you're new to sewing or if you're working with a lightweight yoga knit fabric. To do a straight stitch hem, you'll need a sewing machine and some thread that matches your fabric.
- Step 1: Fold the raw edge of the fabric under by about 1/4 inch. Press it down with an iron to make a nice, crisp fold.
- Step 2: Fold the fabric under again by about 1/4 inch, so the raw edge is completely hidden. Press it down again.
- Step 3: Set your sewing machine to a straight stitch and sew along the edge of the fold, about 1/8 inch from the edge. Make sure to sew slowly and keep the fabric straight.
The main advantage of straight stitch hemming is that it's quick and easy. However, it can create a bit of bulk, especially if you're using a thick fabric. Also, the straight stitch doesn't stretch, so it may not be the best option for fabric that needs to stretch a lot.
2. Zigzag Stitch Hemming
A zigzag stitch is a great option for hemming yoga knit fabric because it stretches with the fabric. This means that your hem won't break or come undone when you move.
- Step 1: Fold the raw edge of the fabric under by about 1/4 inch. Press it down with an iron.
- Step 2: Set your sewing machine to a zigzag stitch. The width of the stitch should be about 2-3 mm, and the length should be about 1-2 mm.
- Step 3: Sew along the edge of the fold, making sure to catch both layers of fabric. You can adjust the width and length of the stitch as needed to get the right stretch.
Zigzag stitch hemming is a bit more time-consuming than straight stitch hemming, but it's worth it for the added stretch. It also gives your hem a more professional look.
3. Serger Hemming
If you have a serger, this is the best way to hem yoga knit fabric. A serger trims the edge of the fabric as it sews, which gives you a clean, finished look. It also uses a chain stitch, which stretches with the fabric.
- Step 1: Set your serger to a narrow hem setting. This will depend on the model of your serger, so check the manual for instructions.
- Step 2: Feed the raw edge of the fabric into the serger, making sure to keep it straight. The serger will trim the edge and sew the hem at the same time.
- Step 3: Adjust the tension of the serger as needed to get a nice, even stitch.
Serger hemming is the fastest and most professional-looking method, but it requires a serger, which can be expensive. If you're serious about sewing yoga knit fabric, though, a serger is definitely worth the investment.
4. Coverstitch Hemming
A coverstitch is a type of stitch that looks like a row of parallel stitches on the top of the fabric and a zigzag stitch on the bottom. It's commonly used for hemming T-shirts and other knitwear, and it's a great option for yoga knit fabric.
- Step 1: Fold the raw edge of the fabric under by about 1/4 inch. Press it down with an iron.
- Step 2: Set your sewing machine to a coverstitch setting. You may need to use a special foot for this stitch, so check your machine's manual.
- Step 3: Sew along the edge of the fold, making sure to catch both layers of fabric. The coverstitch will give your hem a nice, professional look.
Coverstitch hemming is a bit more advanced than the other methods, but it's worth learning if you want to create high-quality yoga wear. It gives your hem a stretchy, durable finish that looks great.
Tips for Hemming Yoga Knit Fabric
- Use the right needle: When sewing yoga knit fabric, it's important to use a ballpoint or stretch needle. These needles are designed to pierce the fabric without damaging the fibers, which helps to prevent snags and runs.
- Test your stitch: Before you start hemming your actual project, it's a good idea to test your stitch on a scrap piece of fabric. This will allow you to adjust the tension and stitch length as needed to get the right look and stretch.
- Press as you go: Pressing your fabric with an iron as you sew helps to keep the folds crisp and the stitches even. It also makes your finished product look more professional.
- Stabilize the fabric: If you're working with a very stretchy fabric, you may want to use a stabilizer to help keep the hem in place. You can use a lightweight interfacing or a stabilizer spray.
Conclusion
Hemming yoga knit fabric doesn't have to be difficult. By choosing the right method and following these tips, you can create a professional-looking hem that will last. Whether you're making yoga pants, tops, or other activewear, a well-hemmed piece of fabric will make your finished product look and feel great.
If you're in the market for high-quality Yoga Knit Fabric, look no further! We offer a wide range of colors, styles, and weights to suit your needs. Our fabric is perfect for making Best Fabric for Yoga Pants and other Yoga Pants Soft Fabric products.


If you have any questions or if you're interested in purchasing our fabric, don't hesitate to reach out. We're here to help you create the perfect yoga wear!
References
- Singer Sewing Machine Manual
- Brother Serger Manual
- Sewing for Dummies by Sue Pryke